
Miami Circle Co. / Lighting size & placement
Light, in
proportion.
The right fixture starts with the room. Find a comfortable scale, a considered placement, and space for everyday living.
Planning guidance drawn from the HVLG Lighting Sizing Guide. Use these proportions as a starting point, then confirm the fixture’s dimensions, hanging range and installation requirements.
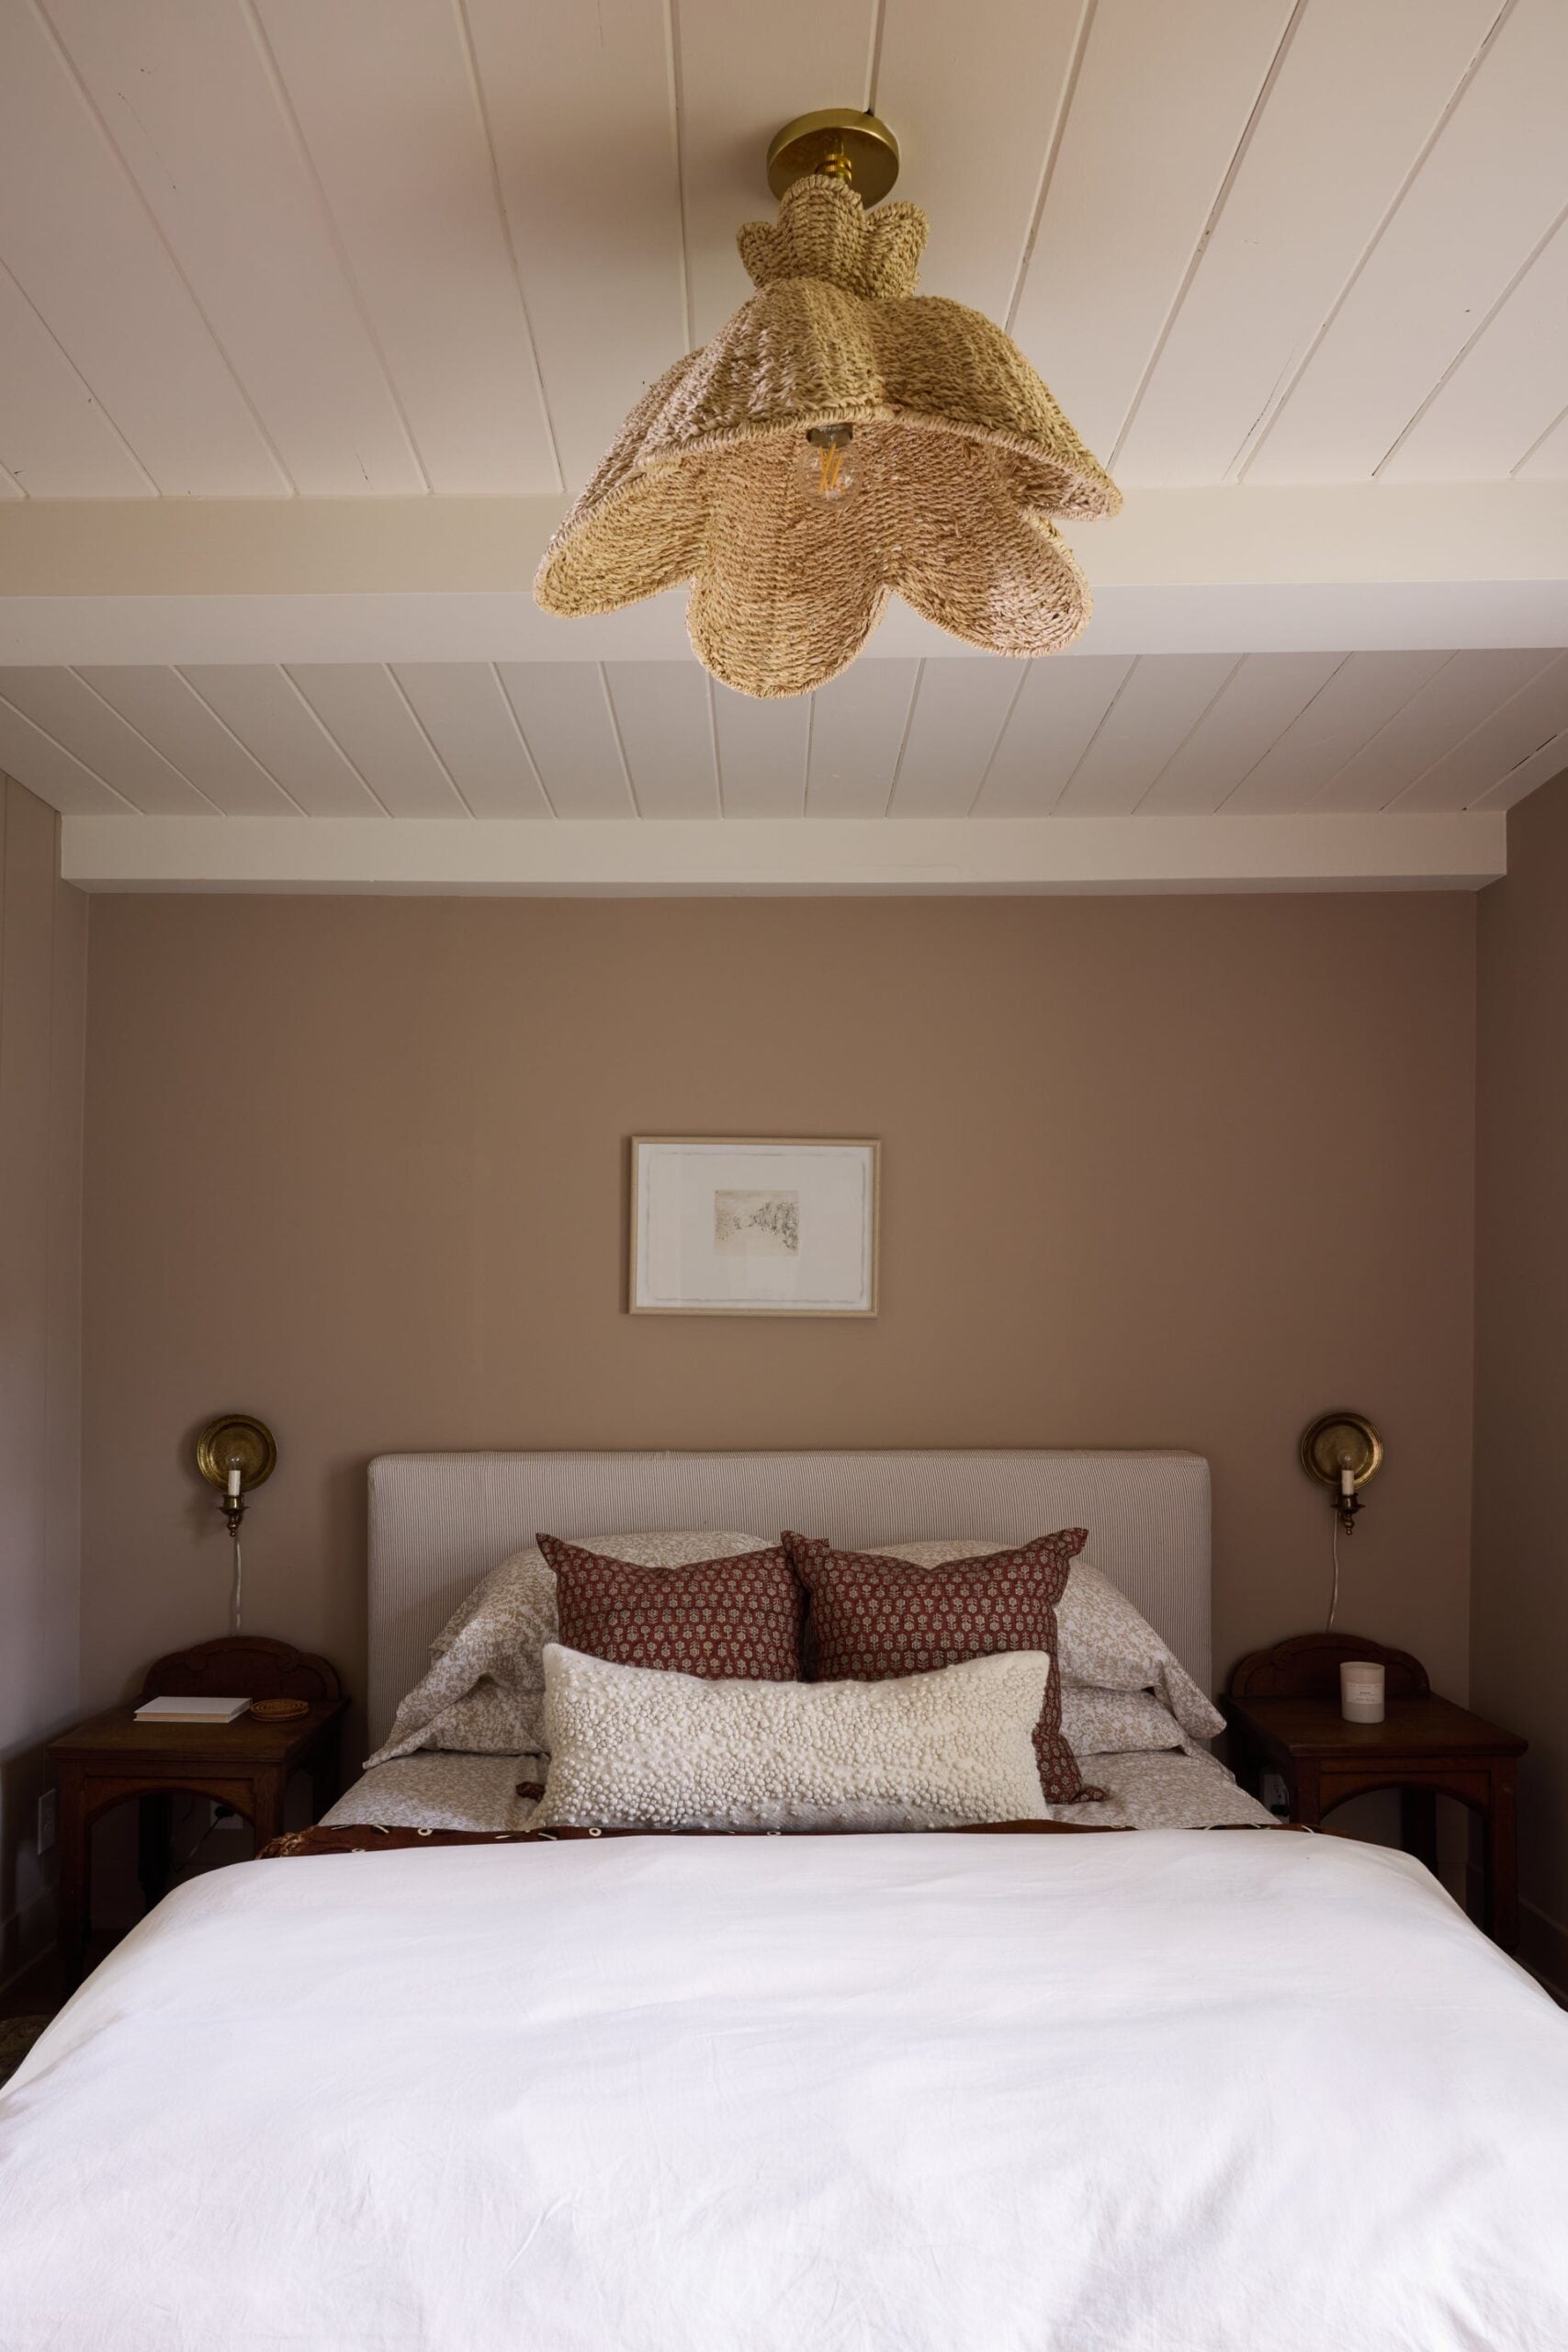
01 / Begin with your measurements
A few numbers.
A better fit.
Measure the room, ceiling and furniture before choosing a fixture. All measurements below use feet or inches as labeled. The examples remain available when the estimators are unavailable.
Whole-room chandelier
Start with the room.
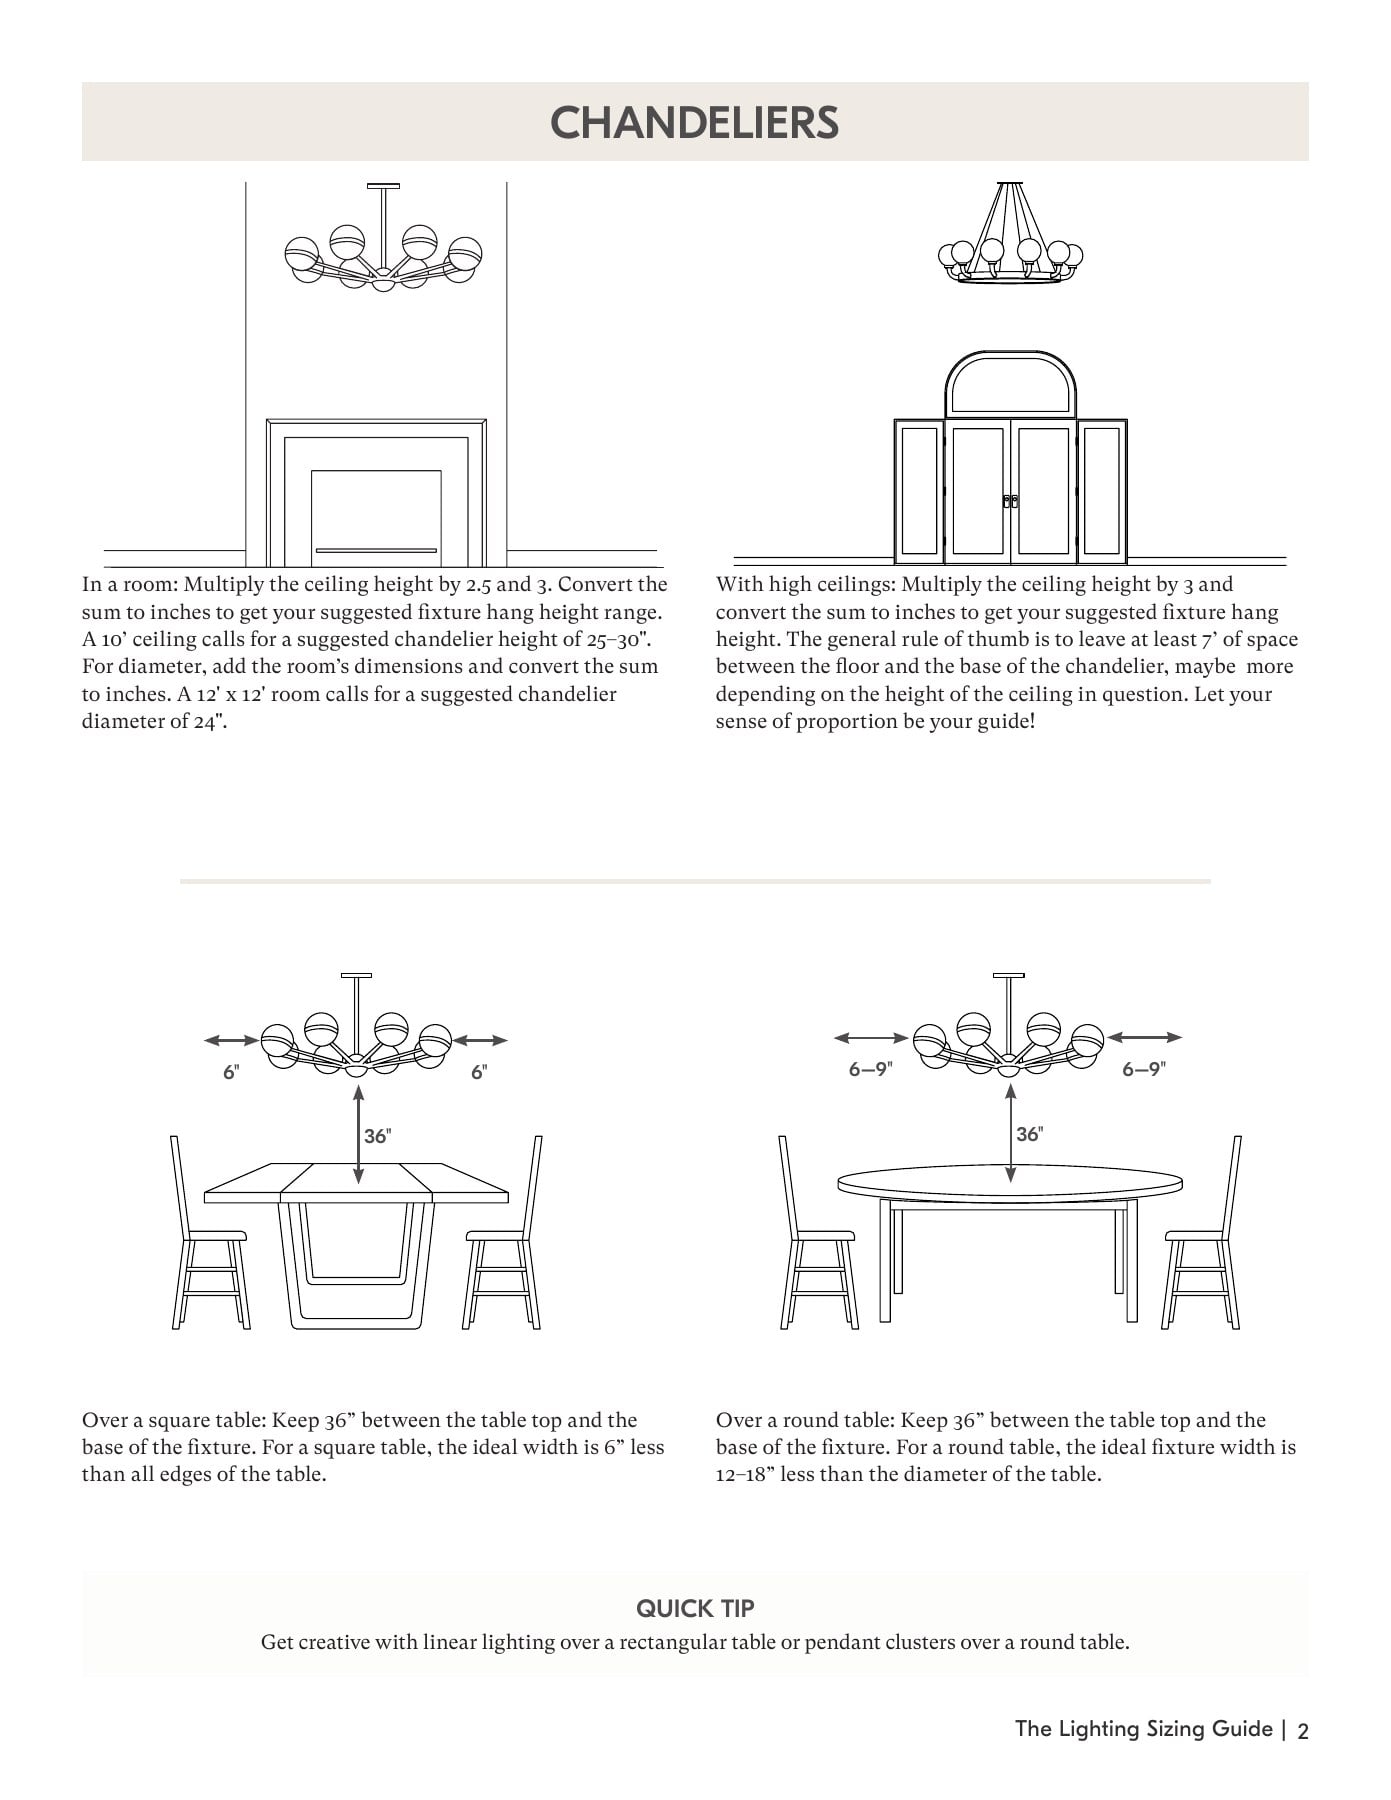
Add the room’s length and width in feet; use that number as an approximate fixture diameter in inches.
Example: 12 ft + 14 ft → about 26 in diameter.
For open floor areas, allow at least 7 ft below the fixture as a planning guideline. Check the full installed drop, including canopy, chain or stem.
Over a dining table
Let the table lead.
For a round table, start 12–18 in smaller than its diameter. For a square table, leave about 6 in of tabletop on each side of the fixture.
Example: a 48 in round table → a 30–36 in fixture.
For rectangular tables, consider a linear fixture or a balanced grouping. Confirm the visual fit and clearances with the specific fixture.
Linear island lighting
Follow the island.
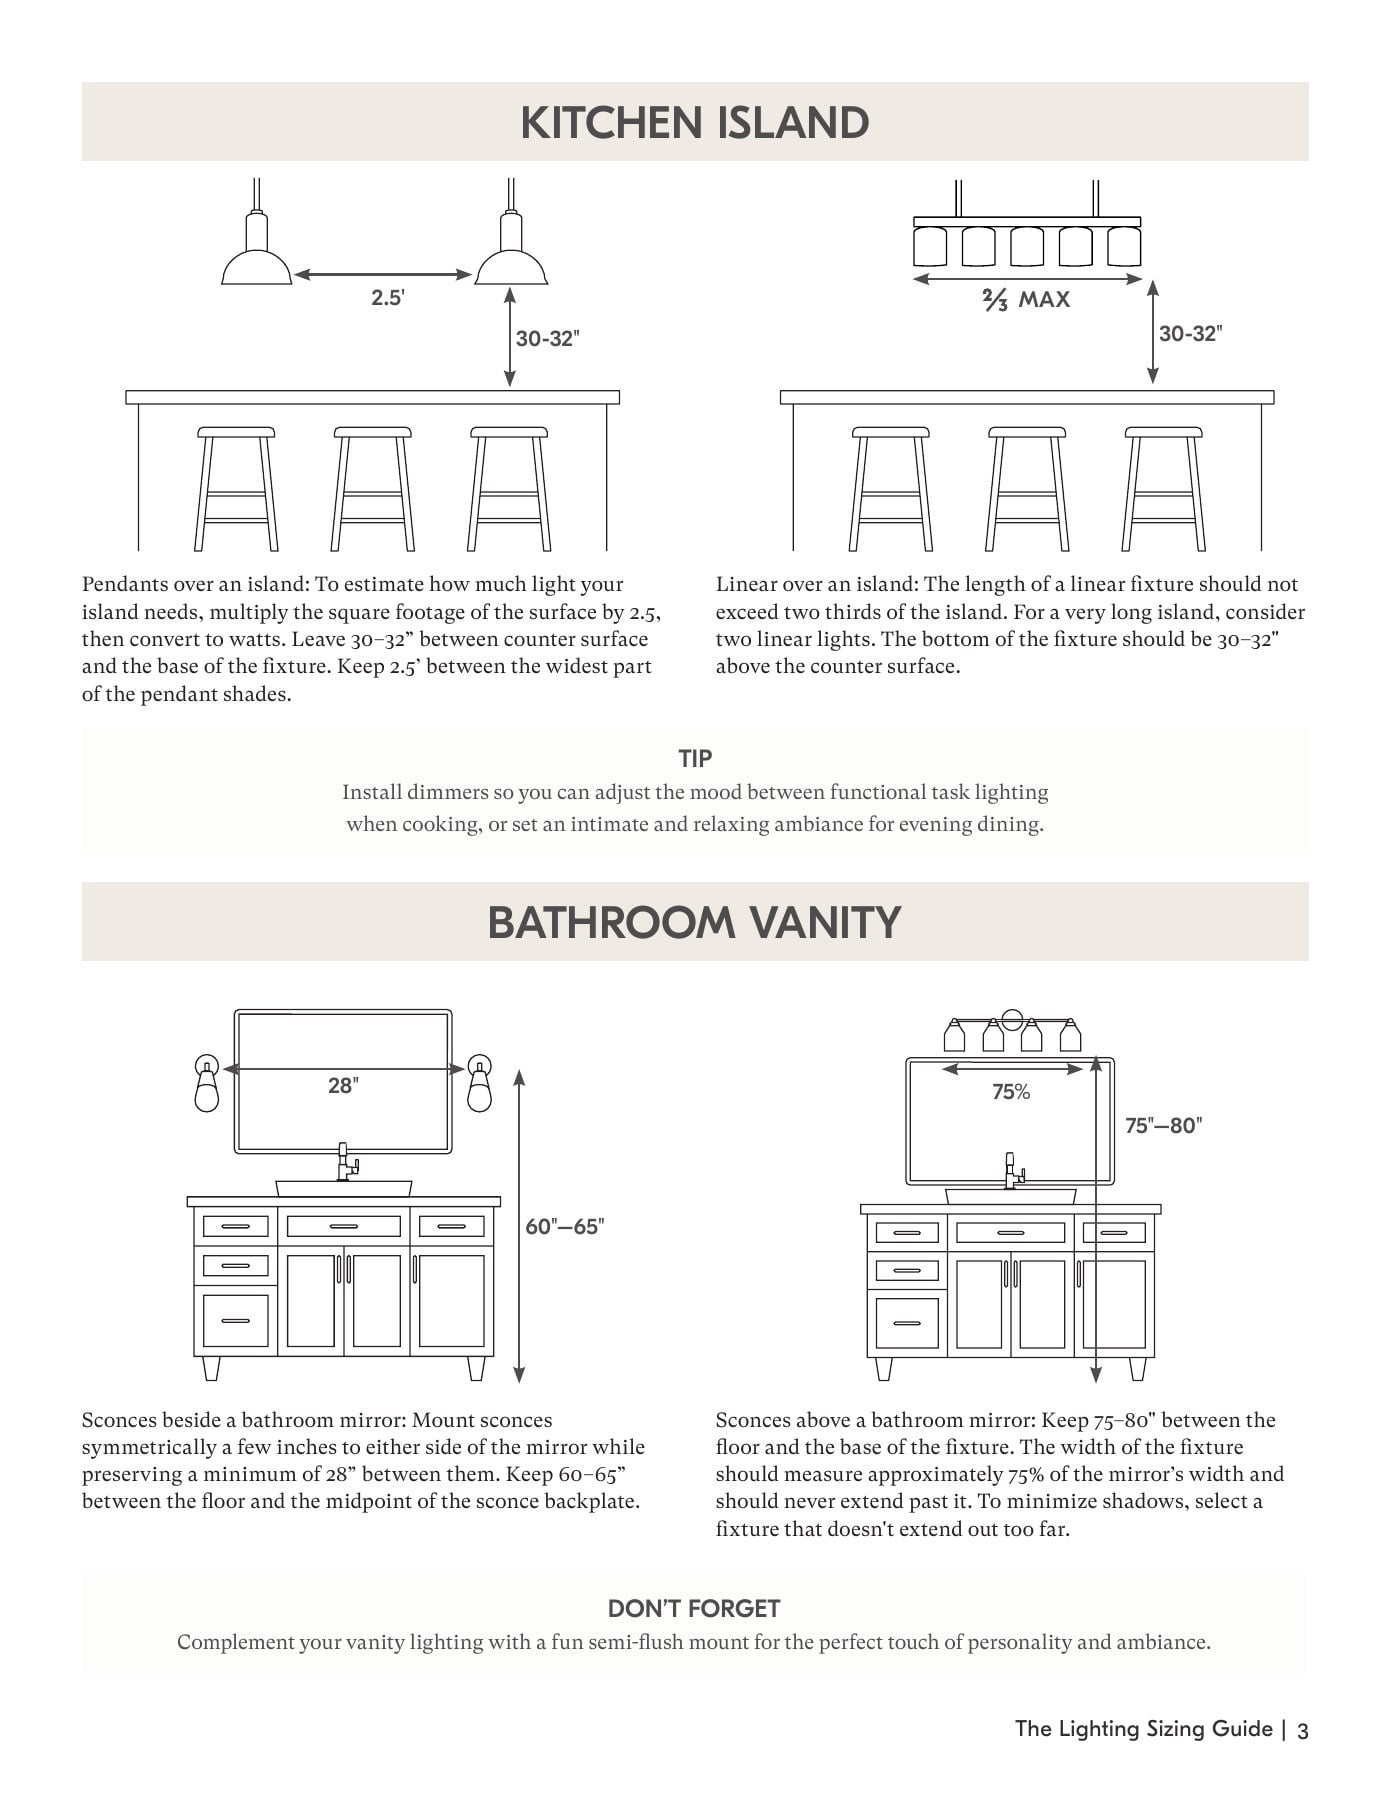
For one linear fixture, keep its length at or below roughly two-thirds of the island’s length.
Example: a 90 in island → up to about 60 in of fixture.
This estimates one linear fixture, not the number or spacing of separate pendants.
Above a bathroom mirror
Frame the reflection.
An above-mirror light around three-quarters of the mirror’s width is a useful starting proportion. Keep the fixture within the mirror’s width.
Example: a 36 in mirror → about a 27 in light.
Side-mounted sconces use different proportions; see the bathroom placement guide below.
02 / Place it thoughtfully
Room by room.
Measure to the part of the fixture named in each guide. A top, bottom or backplate center is a different reference point.
Dining
 Enlarge diagram ↗
36 in above the tabletop
Start with the bottom of the chandelier about 36 in above the table. Center it over the table, then check seated sightlines and the fixture’s actual hanging range.
A light, open fixture can read differently from a solid shade of the same width.
Kitchen
 Enlarge diagram ↗
30–32 in above the counter
HVLG suggests this starting height to the bottom of pendants and linear fixtures. For multiple pendants, its guide suggests about 30 in between the widest shade edges—not between their centers.
Check island ends, sightlines and the width of each shade before deciding how many fixtures fit.
Bathroom
Enlarge diagram ↗60–65 in to a side sconce’s backplate center
For sconces beside a mirror, start a few inches from the mirror with at least 28 in between sconces. For an above-mirror fixture, HVLG places its bottom about 75–80 in from the floor.
Confirm the fixture’s suitability for its bathroom location and the manufacturer’s installation requirements.
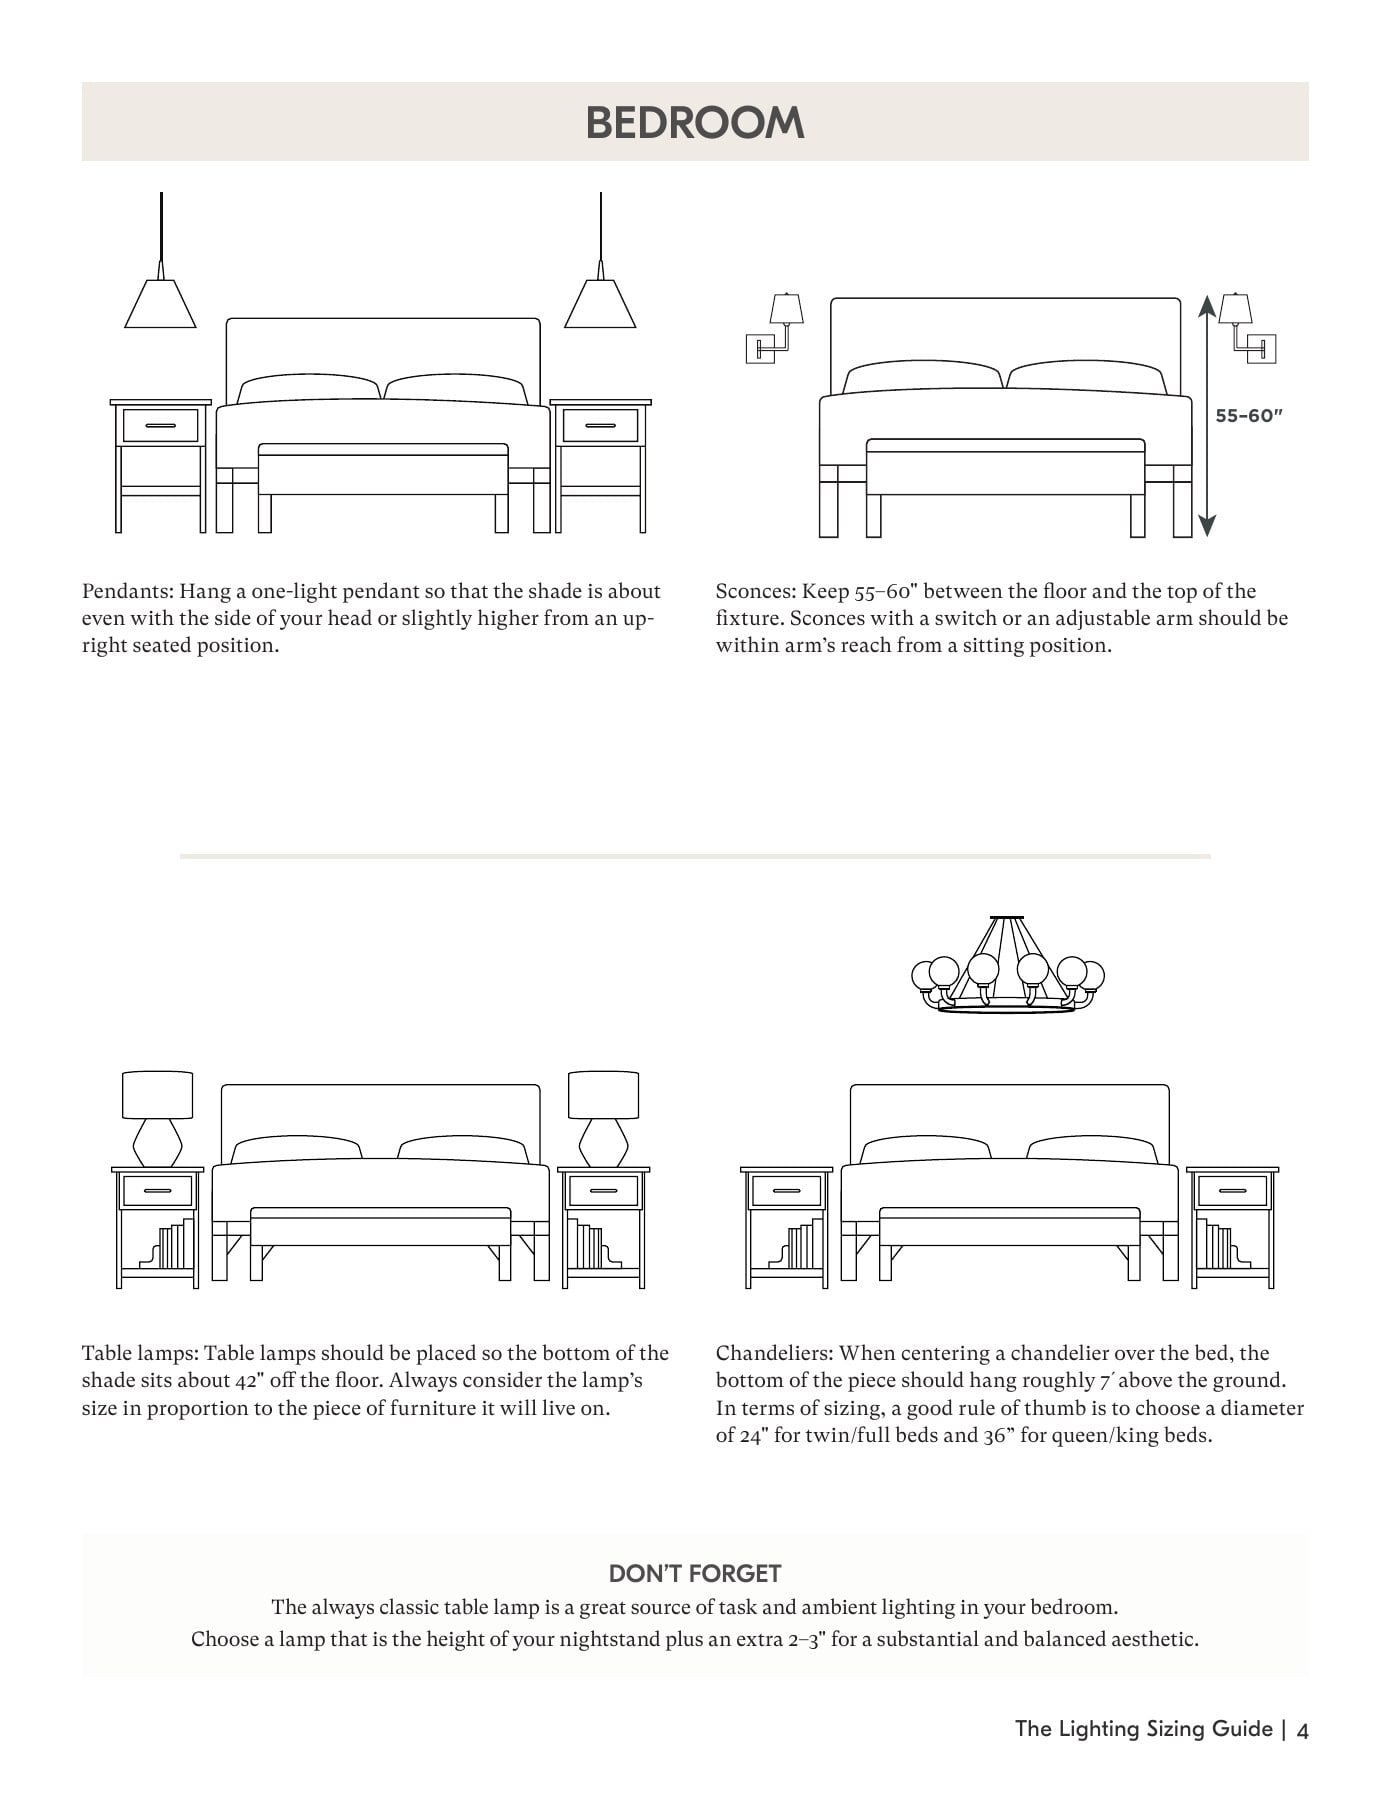
Bedroom
 Enlarge diagram ↗
55–60 in to the top of a bedside sconce
Keep switches or adjustable arms within reach while seated. For bedside pendants, position the shade around head height or slightly higher when sitting upright.
For a chandelier over a bed, the guide starts around 24 in diameter for twin/full beds and 36 in for queen/king beds, with roughly 7 ft below the fixture.
Entry & exterior
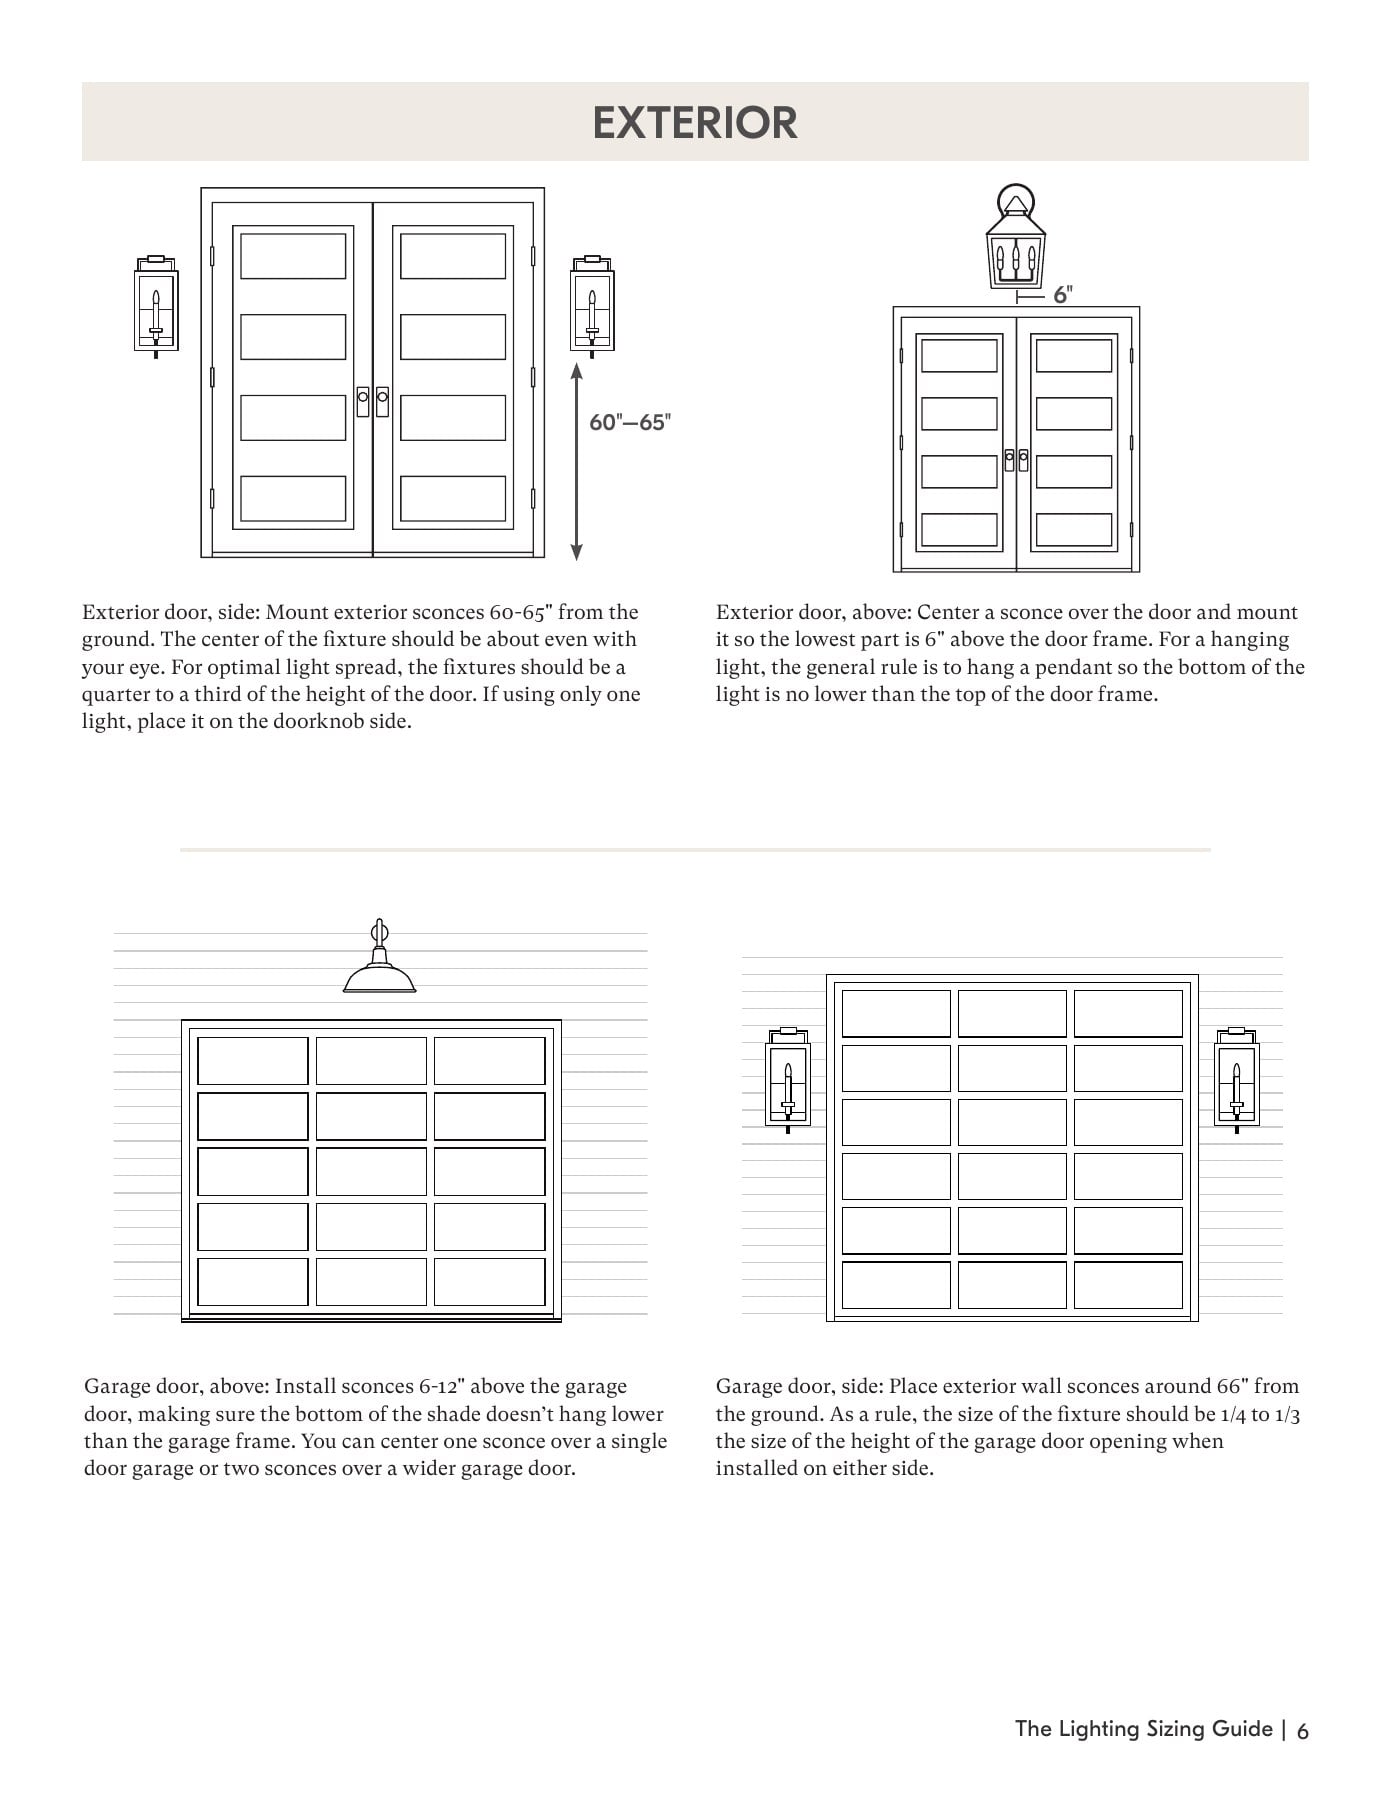 Enlarge diagram ↗
¼–⅓ of the door’s height
Use this as a starting fixture height for exterior lights beside a door. Center them about 60–65 in above the ground. A porch pendant should stay above the top of the door frame.
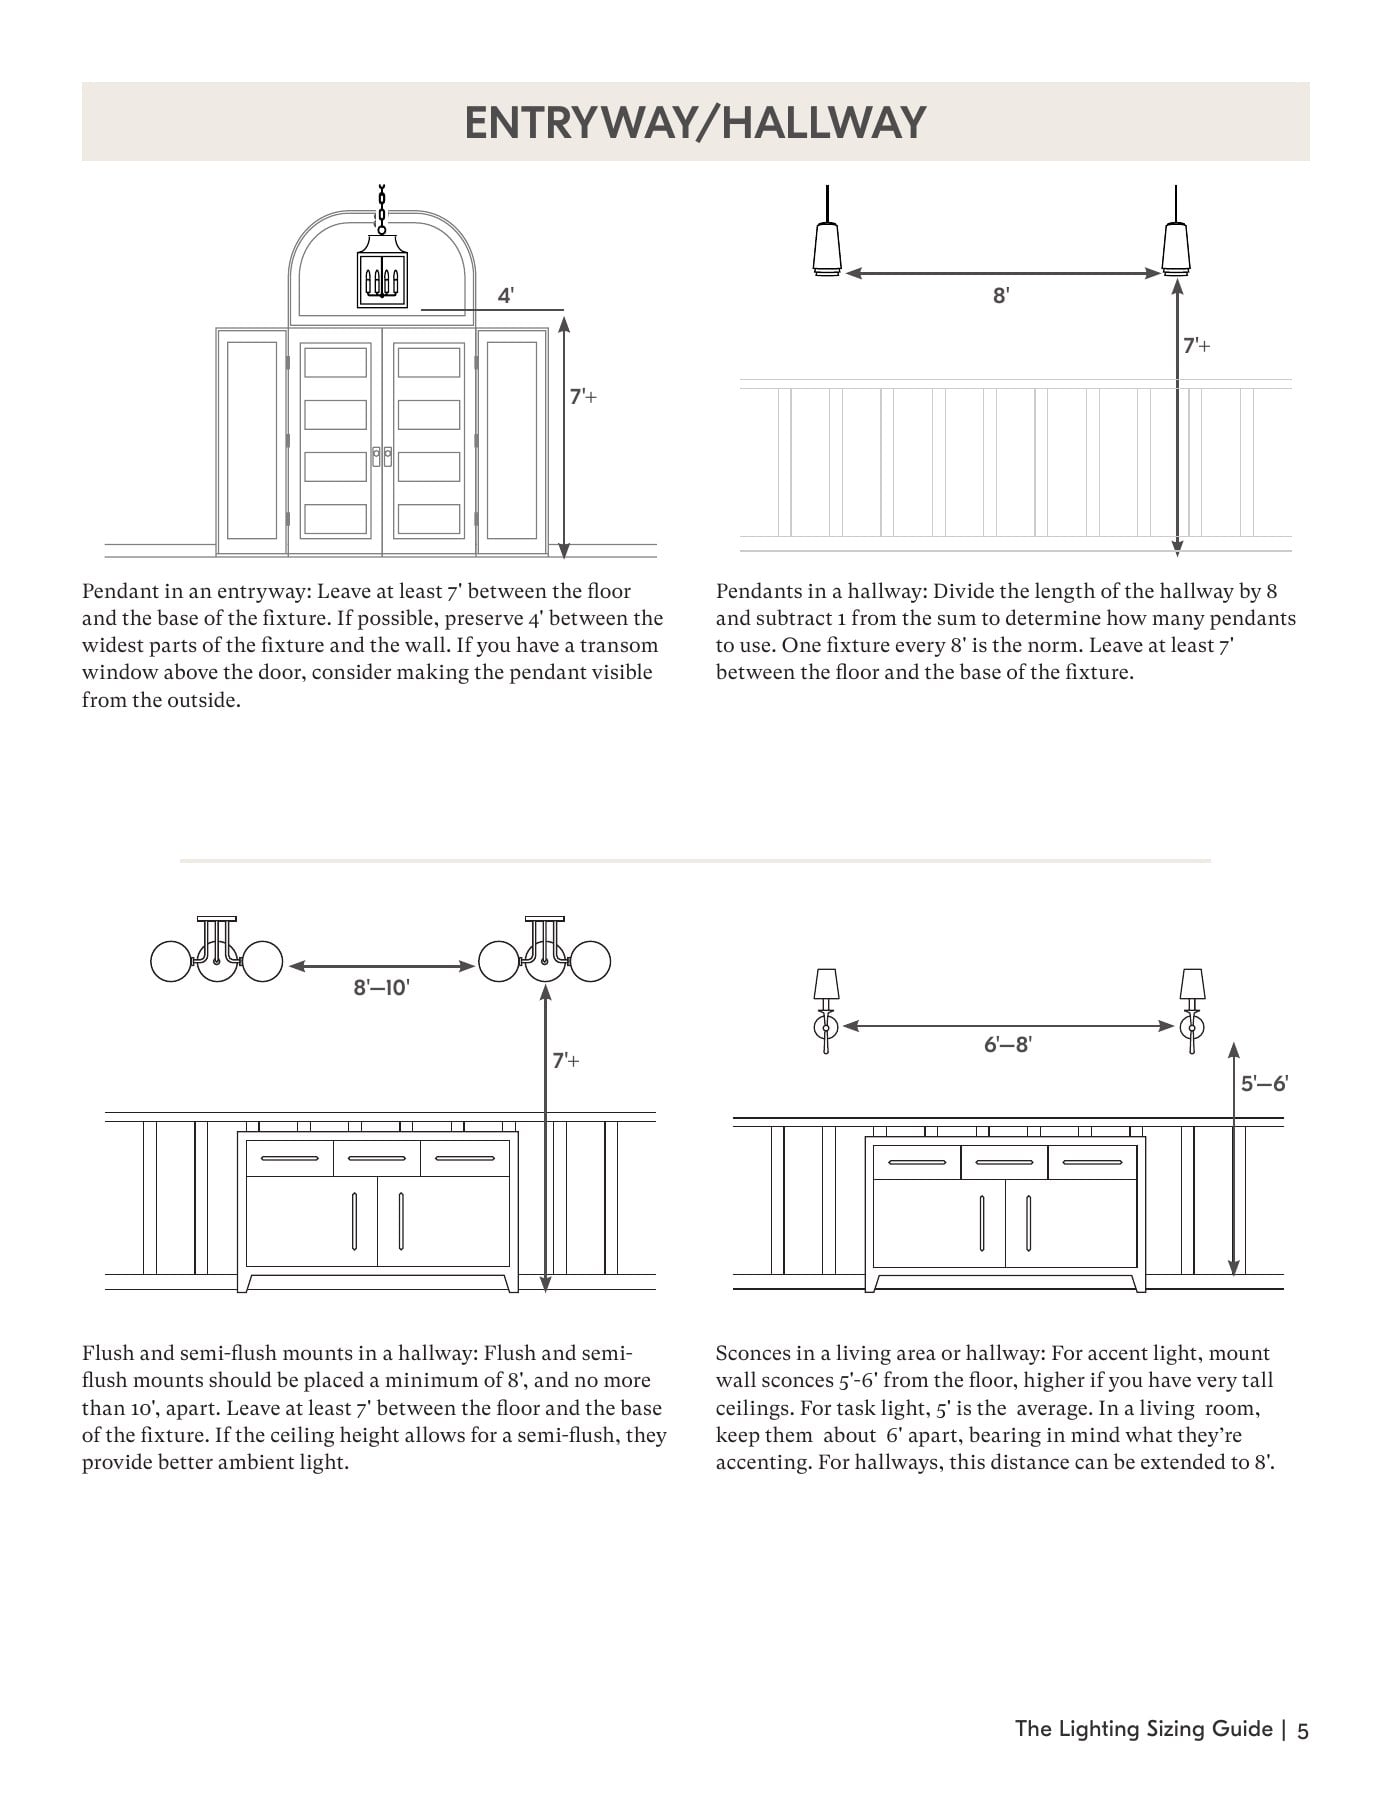
Indoors, plan at least 7 ft of clearance under a hallway pendant. Outdoors, check door swing and the fixture’s damp or wet location rating.
Art & lamps
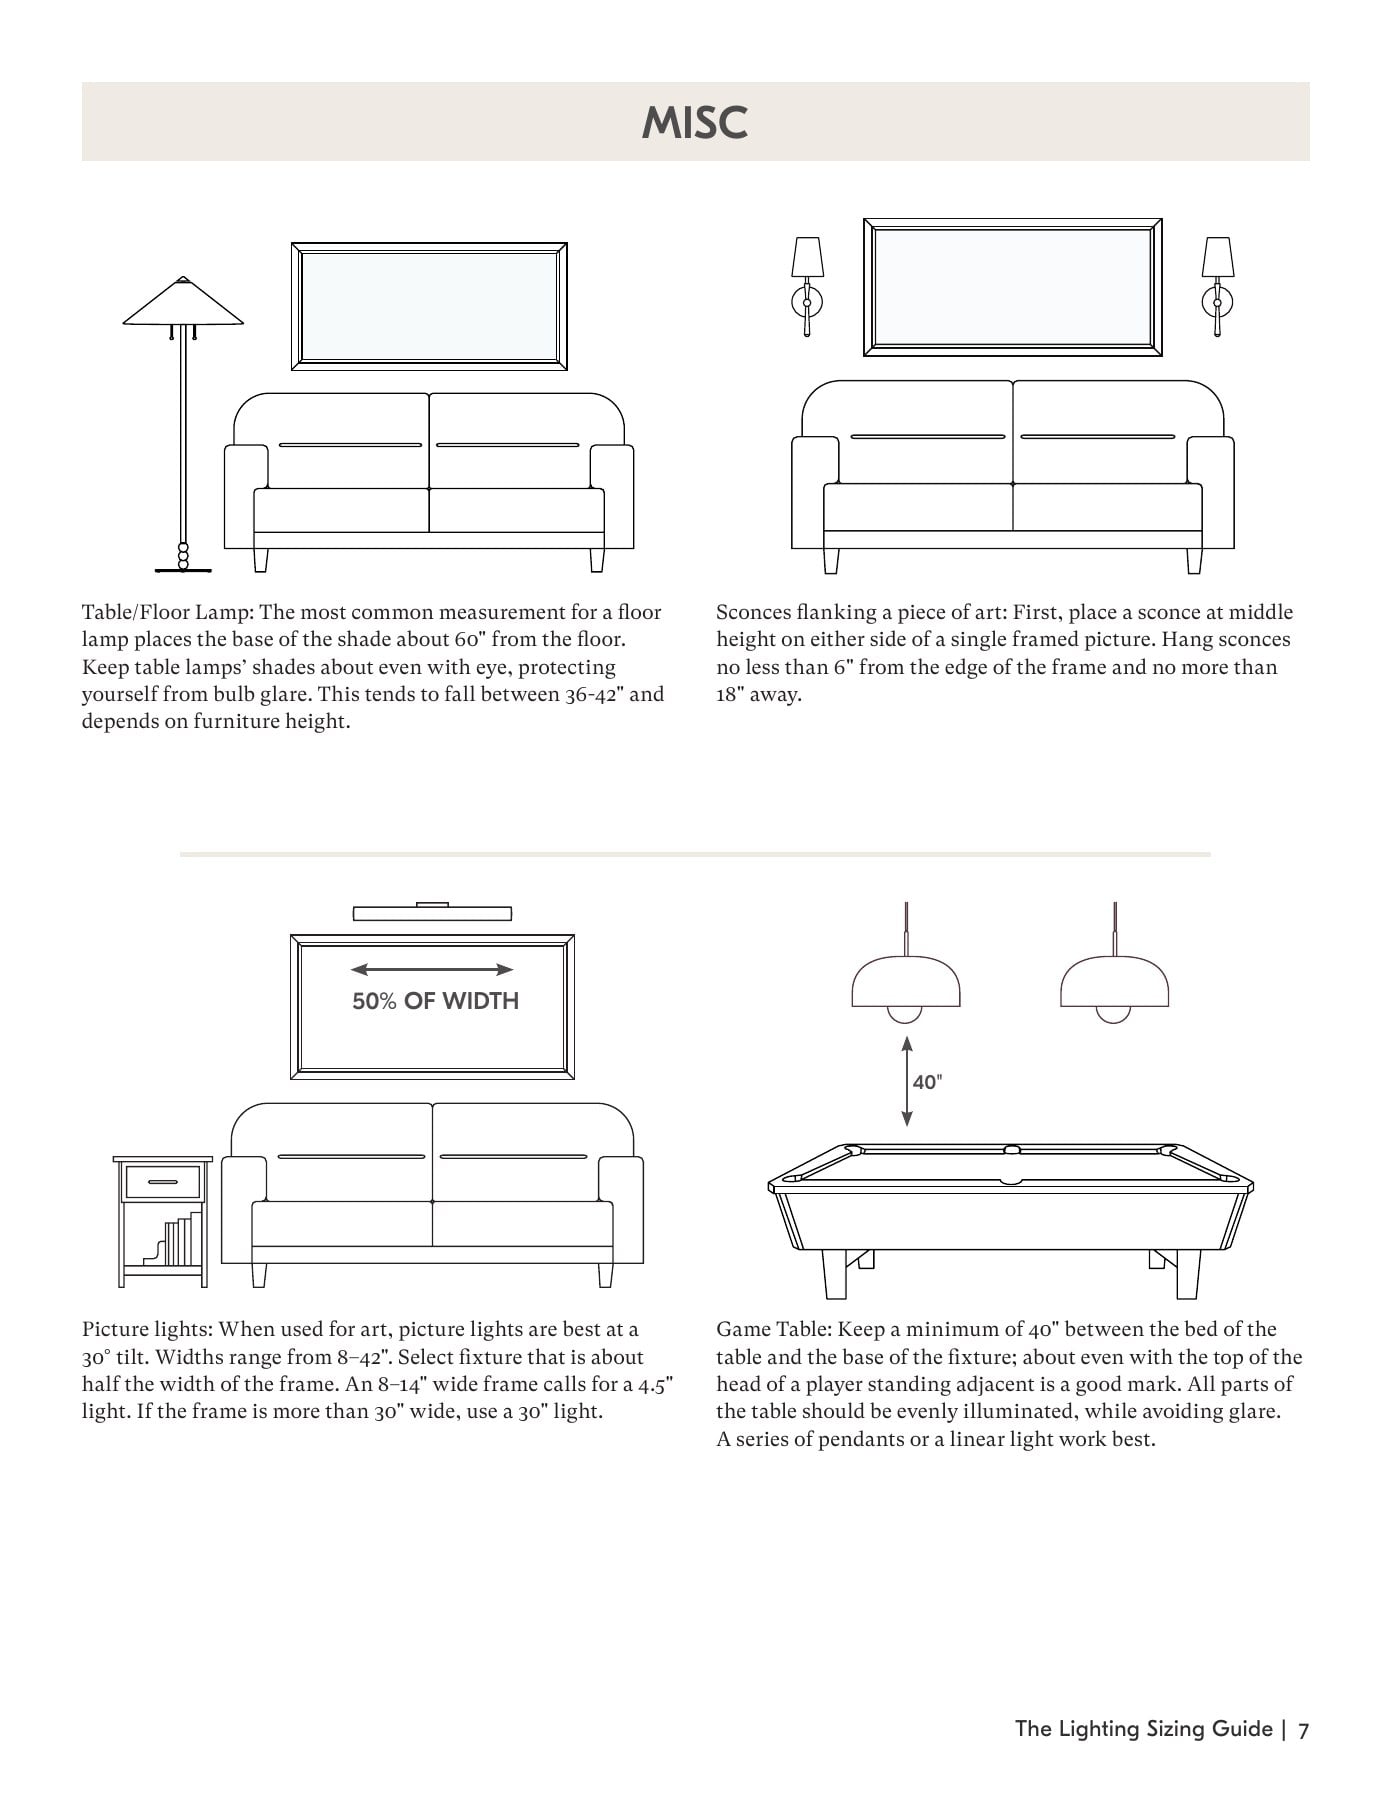 Enlarge diagram ↗
Eye level for the bottom of a table-lamp shade
Judge table lamps while seated; the guide suggests roughly 36–42 in from the floor to the shade’s bottom. A picture light around half the frame’s width is a starting proportion, with coverage confirmed for the actual artwork.
For sconces flanking artwork, start 6–18 in from the frame edges. Aim picture lighting carefully to limit glare.
03 / Keep the reference close
The complete
HVLG guide.
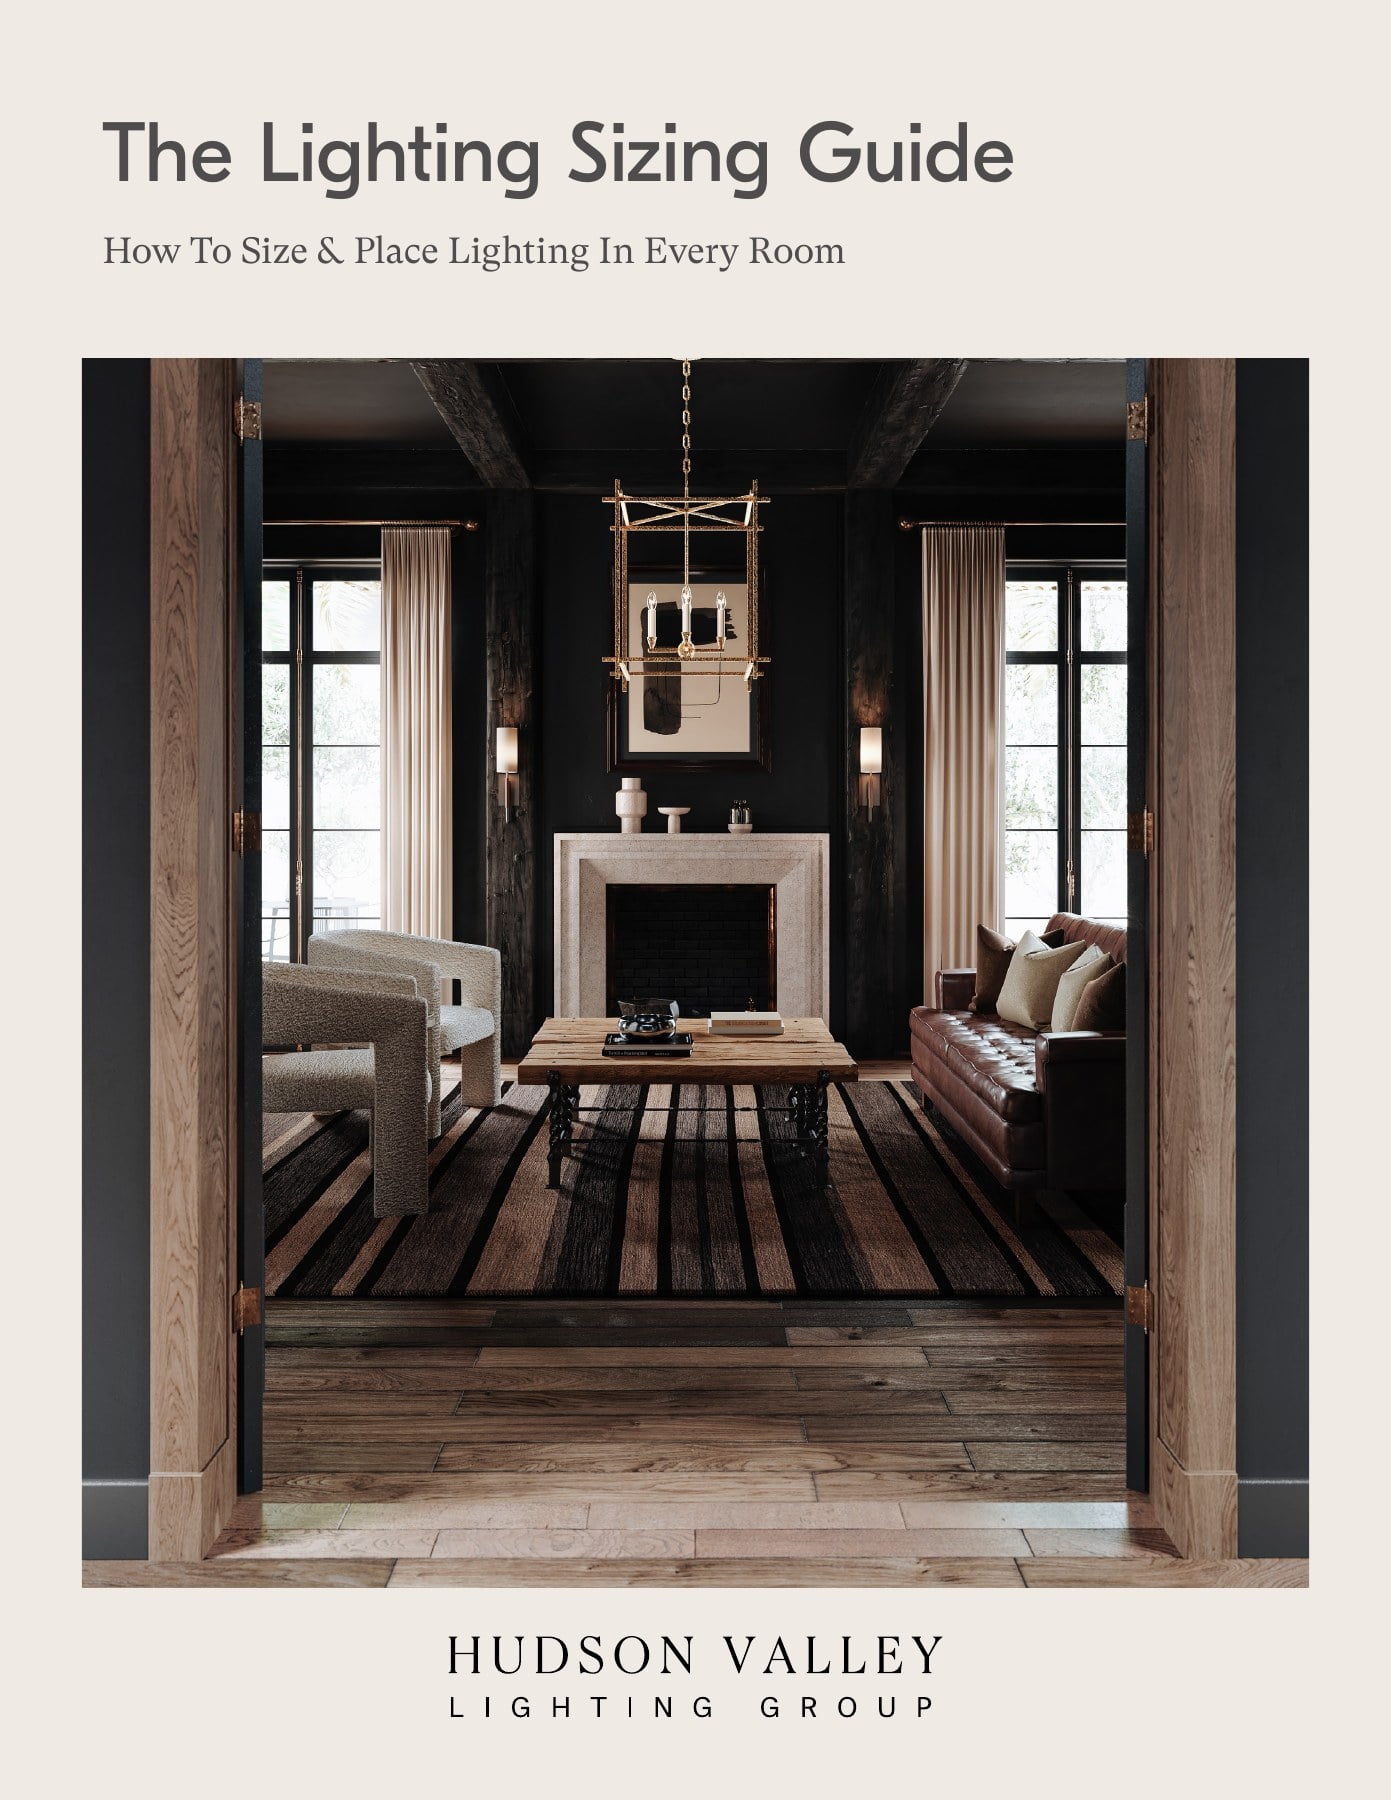
Browse all eight pages with diagrams for dining rooms, kitchens, bathrooms, bedrooms, entries, exterior lighting, artwork and lamps. Enlarge a page, like it, or add it to your collection.
Source: Hudson Valley Lighting Group, Lighting Sizing Guide, PDF_0222. These are design starting points; final mounting positions depend on the fixture, room and installation requirements.
Make it yours
Bring us your room.
Save the fixtures you love in the lighting library. Add ceiling height, table or island dimensions, finish and quantity to your collection notes so we can help narrow the choices.